Hardware setup guide#
This guide contains information about:
Cheese3D rig part list#
Six high-speed monochrome cameras were used to record the video data at 100 fps. See the table below for the part list of a Cheese3D camera set-up:
Part |
Quantity |
Buyer (Part #) |
Notes |
|---|---|---|---|
Chameleon®3 Monochrome Camera |
6 |
Edmund Optics (33-162) |
Camera locations should be selected such that each keypoint is visible by at least 2 cameras. |
Camera Lens (8 mm) |
4 |
Thorlabs (MVL8M23) |
For the LEFT, RIGHT, TOP LEFT and TOP RIGHT views. |
Camera Lens (12 mm) |
2 |
Thorlabs (MVL12M23) |
For the TOP CENTER and BOTTOM CENTER views. |
CS to C-mount Lens Adaptor |
6 |
Edmund Optics (03-618) |
To mount the lens on the camera. |
Spacer ring |
6 |
Lab-custom 3D-printed |
Inspired on Edmund Optics (03-633). Thickness may vary depending on camera location. |
Blackfly S Tripod Adapter |
6 |
Edmund Optics (88-210) |
To mount the cameras. |
Type-A to Micro-B Cable |
6 |
Edmund Optics (86-770) |
To connect the camera to the computer. |
IR30 WideAngle IR Illuminator |
3 |
Amazon (B001P2E4U4) |
To light the rig. |
Infrared Emitter LED |
1 |
Mouser (SML-S15R2TT86) |
To temporally synchronize the cameras. |
Arduino MEGA Rev3 |
2 |
Arduino (A000067) |
One board is used to send the sync pulse to the infrared LED. The other board is used to send the signal that starts the video-recording. |
Push button |
1 |
Amazon (B01E38OS7K) |
To trigger the start of the recording. |
Breadboard |
1 |
Amazon (B00Q9G8MQS) |
To connect electronic componenets (e.g., push button) |
Placing the cameras at the recommended locations will result in the following keypoints visible by each camera view. See Supplementary Table 1 from manuscript below:
Facial keypoint |
Left |
Right |
Top Left |
Top Right |
Top Center |
Bottom Center |
|---|---|---|---|---|---|---|
nose(bottom) |
✅ |
✅ |
✅ |
|||
nose(tip) |
✅ |
✅ |
✅ |
✅ |
✅ |
✅ |
nose(top) |
✅ |
✅ |
✅ |
✅ |
✅ |
✅ |
pad(top)(left) |
✅ |
✅ |
✅ |
|||
pad(side)(left) |
✅ |
✅ |
||||
pad(top)(right) |
✅ |
✅ |
✅ |
|||
pad(side)(right) |
✅ |
✅ |
||||
pad(center) |
✅ |
✅ |
✅ |
|||
lowerlip |
✅ |
✅ |
✅ |
|||
upperlip(left) |
✅ |
✅ |
||||
upperlip(right) |
✅ |
✅ |
||||
eye(front)(left) |
✅ |
✅ |
✅ |
|||
eye(top)(left) |
✅ |
✅ |
✅ |
|||
eye(back)(left) |
✅ |
✅ |
✅ |
|||
eye(bottom)(left) |
✅ |
✅ |
✅ |
|||
eye(front)(right) |
✅ |
✅ |
✅ |
|||
eye(top)(right) |
✅ |
✅ |
✅ |
|||
eye(back)(right) |
✅ |
✅ |
✅ |
|||
eye(bottom)(right) |
✅ |
✅ |
✅ |
|||
ear(base)(left) |
✅ |
✅ |
||||
ear(top)(left) |
✅ |
✅ |
||||
ear(tip)(left) |
✅ |
✅ |
||||
ear(bottom)(left) |
✅ |
✅ |
||||
ear(base)(right) |
✅ |
✅ |
||||
ear(top)(right) |
✅ |
✅ |
||||
ear(tip)(right) |
✅ |
✅ |
||||
ear(bottom)(right) |
✅ |
✅ |
Hardware circuit assembly#
Arduinos are used to interface between the recording system and computer. Use the circuit below as reference for assembling the parts above.
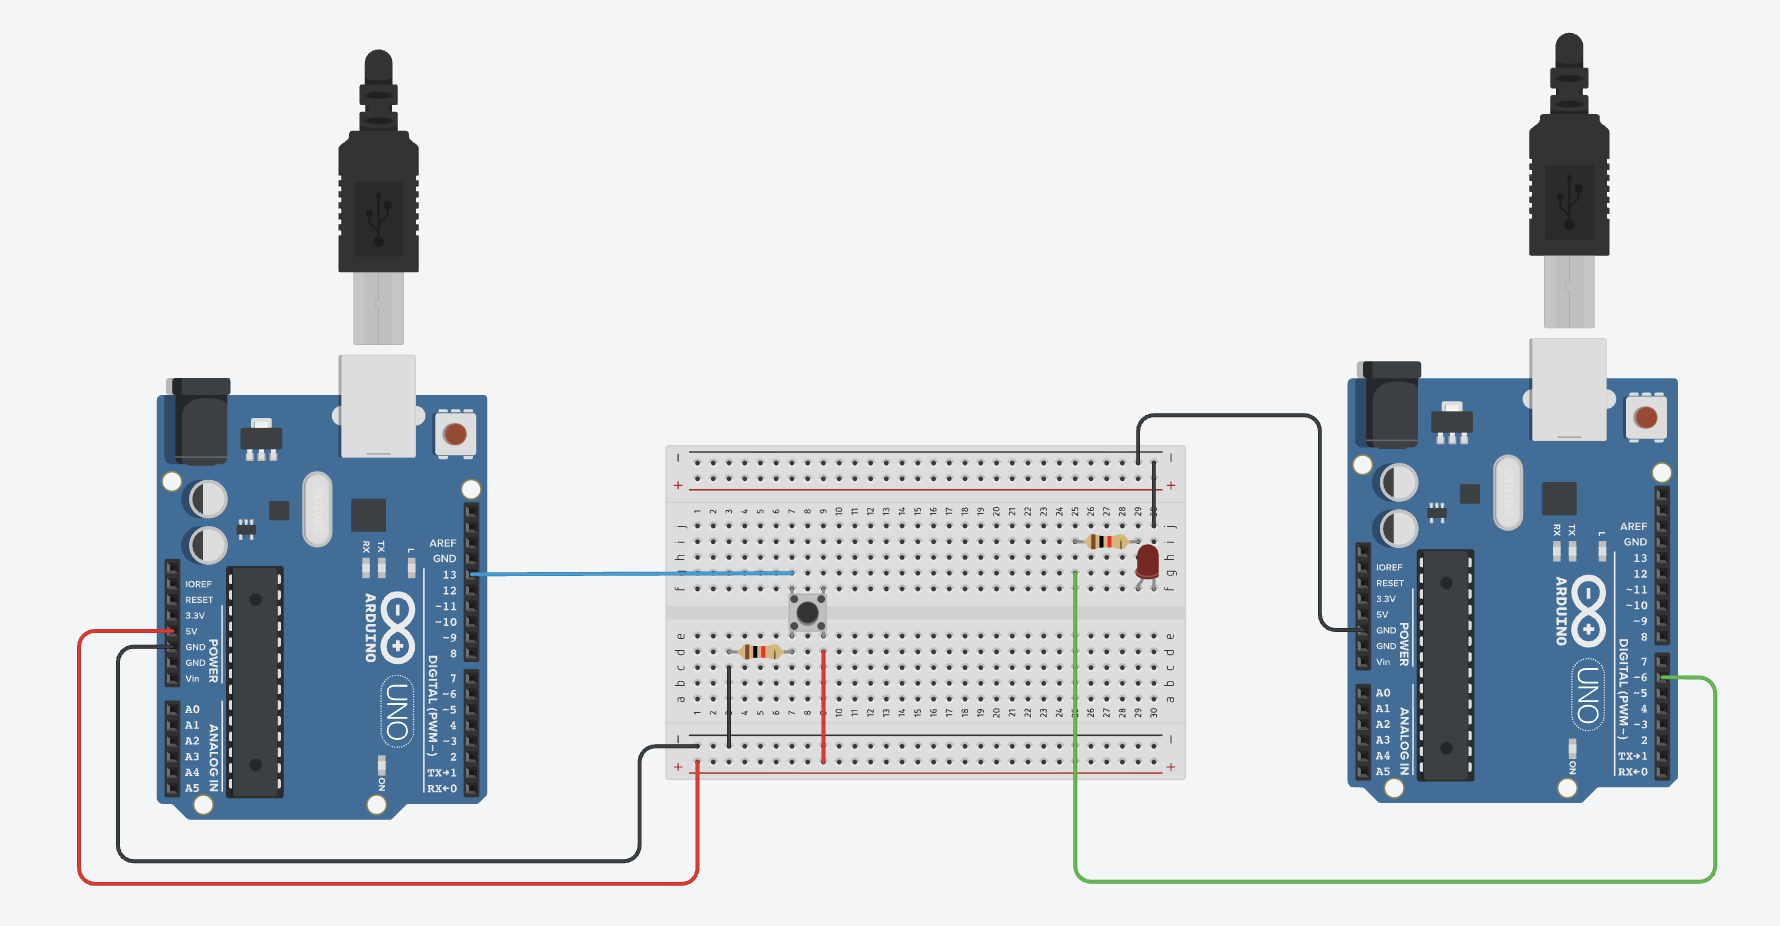
Synchronization#
Cameras are temporally synchronized with an infrarred LED that is visible from the six views. The LED (see Cheese3D Hardware Parts List) turns on for 20 ms every 10 ± 0.5 s. The pulse is detected on each view post-hoc through our pipeline (refer to the Methods section Video capture, synchronization, and 3D calibration system in our manuscript for more information).
Spatial synchronization is achieved with a manufactured calibration board with a standard ChArUco template imprinted on its surface. We used 7 × 7 ChArUco board (4.5 mm marker length, 6 mm square side length, ArUco dictionary DICT_4x4_50). Before and after each experimental recording, the ChaRuCo board is placed inside the rig by the experimenter, while rotating over the camera views and making sure it stays on focus.
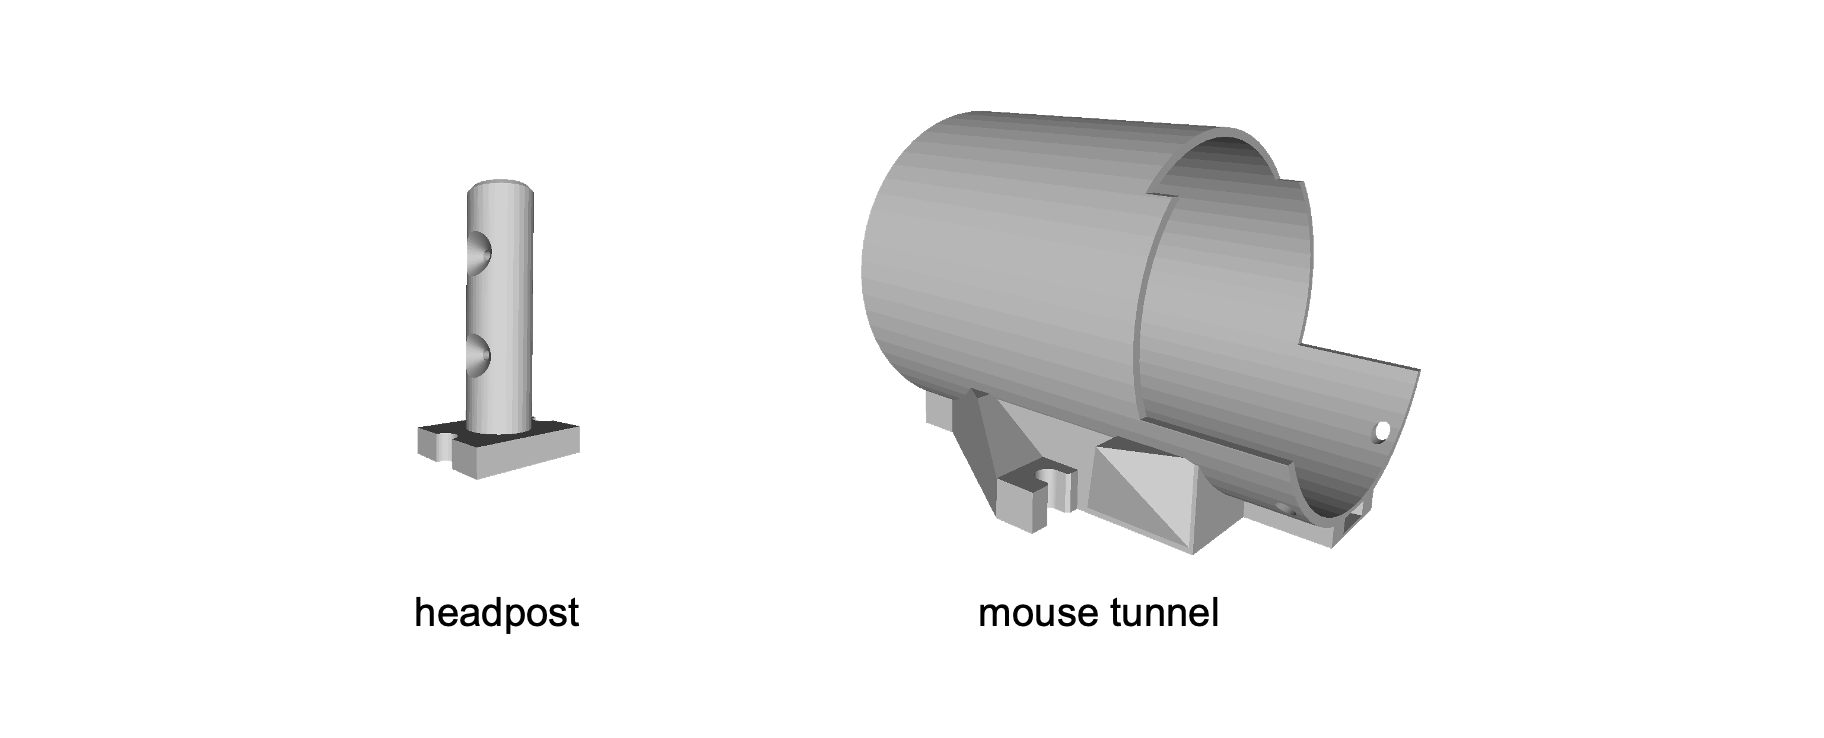
Head-fixation#
To acquire high-resolution facial video while maintaining comfort for natural behavior, mice are acclimated to sitting in a tunnel with the head secured using a lightweight headpost, custom-designed to allow unobstructed viewing of all facial areas.
See below the headpost and tunnel models (note the parts are not to scale, we recommend referring to the manuscript or the .STL files in this folder for the true measurements).
Recording protocol#
The following code was optimized to run on Windows and the following programs should be installed:
Arduino IDE (version 2.1.0)
Bonsai (version 2.8.1)
Spinview (version 1.29.0.5)
FFMPEG (version 6.0)
Organization#
The files for recording can be found in this folder. They are organized as:
run-behavior.ps1: The main script used to start recording.
20230928_Bonsai_Behavior_6cam_hd.bonsai: Bonsai program that records from six cameras to Windows pipes and outputs serial port metadata from Arduino to
stdout. Note you will need to change the serial number associated to the cameras and Arduino nodes.ffmpeg_filter.txt: An FFMPEG “complex filter graph” specification used by
run-behavior.ps1to post-process pipe output from Bonsai to video file (this will flip and rotate input streams before saving; you may want to modify this to suit your setup).manual_recording.ino: This code should be uploaded to the Arduino that will trigger the start of the recording. Note this board should be connected to the computer.
simple_LED_blink.ino: This code should be uploaded to the Arduino that will send the pulse to the synchronizing LED. Note this board does not need to be connected to the computer, but to a power source.
Preparation#
Open a Powershell prompt by going to the “Start Menu > Terminal”. Change directories to the location of this folder (typically C:\\Users\...\hardware).
First, make sure the Arduino script manual_recording is uploaded, reset and running.
Run the behavior script#
.\run-behavior.ps1 -EXP "chewing" -EXPERIMENTER "you" -SESSION="mice" -MOUSE "1" -COND "baseline"
This will run the Bonsai program, which should start recording as soon as the “start” message is delivered over the serial port. If using the provided manual_recording Arduino program, then press the push button to send this message. It will also start FFMPEG after a 4 second delay (to ensure that the Bonsai program has finised creating the Windows pipes). As recording progresses, FFMPEG will print out the length of the video file written to disk and the speed of writing to disk (which should be around 0.9-1.0x).
To stop recording, go to the bottom right corner of the taskbar in Windows (where volume, etc. is located). Find the Bonsai logo and right-click, then select “Stop”. This will close the currently running Bonsai process and FFMPEG will stop printing in the Terminal window. The script should finish by itself. To ensure that no data is lost, add some buffer time to the end of recording before stopping Bonsai.
Behavior script flags#
There are a number of flags/parameters passed to the behavior script.
MOUSE(required): the name of the mouse currently on the rigEXP(required): the name of the experimentCOND(required): the name of the condition (sub-variant) of the experimentEXPERIMENTER(required): the name of the person recordingSESSION: the identifier all the mice in the session (defaults toMOUSE)ID: a unique identifier to separate repetitions of the same condition and mouse (defaults to “000”; do not use this to repeat a failed trial)RIG: the rig identifier (defaults to “2”)NCAMS: the number of cameras on the rig (defaults to 6)